HomeHow toHow to Remove Thermal Paste

How to Remove Thermal Paste [Step-by-Step Guide]

When you build your PC, you aim to run it smoothly, but it’s not a big thing. You must be getting the up-to-the-mark outcome from your machine. If you want to know how to remove thermal paste from your CPU, this post will guide you in detail. You can get better heat efficiency when you remove or repair the processor’s thermal paste. There’s no complex process; it comes with some easy steps, and the thermal paste will be removed. Keep reading to know about the procedure to remove thermal paste.

When you experience that your machine is running hot, you may need to remove the thermal paste. If you want to know how to clean the CPU’s thermal paste, read our guide on how to clean thermal paste off cpu. When you insert the thermal paste after cleaning it, you will experience that your processor’s heat efficiency will be better.

The other reason is to remove the thermal paste when upgrading your CPU coolers. After repairing or replacing the CPU thermal paste, you will experience that your processor will generate heat efficiency, even when your system overheats. Also, you will not face any slow-down issues with the system.

How to Remove Thermal Paste?

When removing or replacing thermal paste, you need to follow these steps:

Step 1: Turn on the PC:

The first step in removing the thermal paste is turning on your PC. Let your PC run for a few minutes before shutting down and unplugging the PC. The best setting for thermal paste is to set it cold; pulling the heatsink cooler hard may damage the processor. So, it’s best to use the hot air gun or hot air dryer to remove gently.

Step 2: Detaching the Heatsink:

The next step is to remove the heatsink or the cooling support from the CPU. For it, loosen the screws with complete care and take your time.

Detaching the Heatsink

Step 3: Wipe-Off the Thermal Paste:

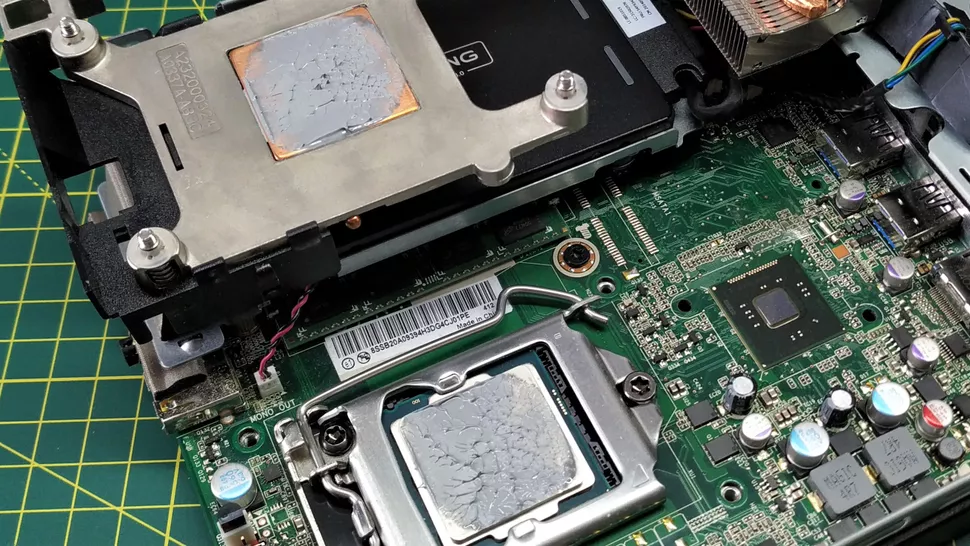
Now, the next step is to wipe off the CPU thermal paste. For this, follow these steps:

  • Gather the supplies like lint-free cloth and a little isopropyl alcohol.
  • Use the isopropyl alcohol in a few quantity and put it on the lint-free cloth.
  • Start wiping thermal paste from the heatsink.

To clean the heatsink, you also test how efficiently the paste cleans off before going to the processor.

Wipe-Off the Thermal Paste

Step 4: Cleansing the Paste:

You can clean the processor paste using the cloth and isopropyl alcohol. Now, gently remove the paste by keeping the processor on the socket. Please do it carefully and remove the residual paste using the cotton swab.

Step 5: Applying Thermal Paste:

Now, you need to apply the required amount of thermal paste to the CPU. Firstly, ensure that the isopropyl alcohol evaporates and check that no debris and residuals are left behind before applying.

Step 6: Fix Back the Heatsink:

Now, you need to fix back the heatsink. For this, apply the pressure by putting it on the CPU top.

Step 7: Tightening the Screws:

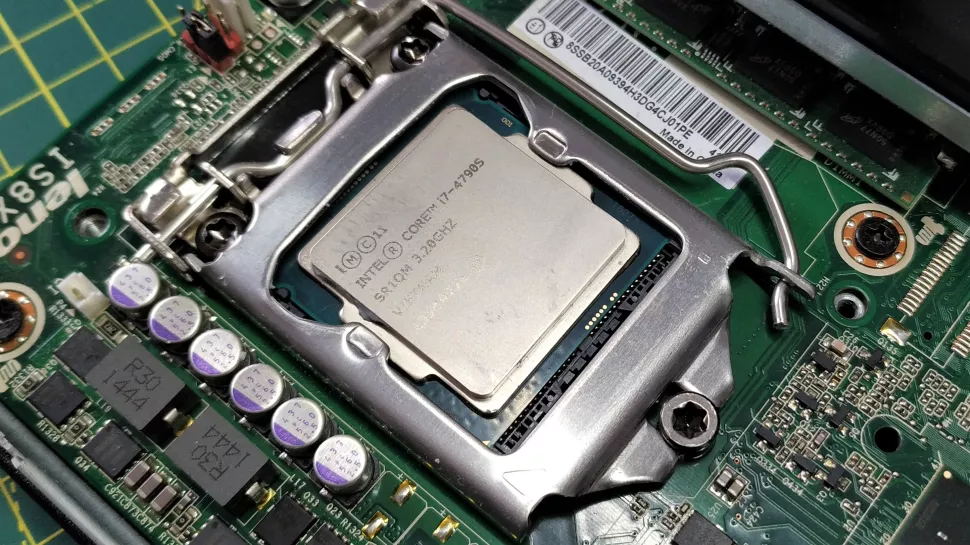
Now, you have to tighten the screws of the heatsink or cooling assembly. You need to tighten it diagonally. Ensure there’s no residual paste left behind on the CPU corners, as it creates the issues. Also, when tightening the screws, don’t put too much pressure.

Tightening the Screws:

Step 8: Power On the PC:

Now, start your PC and use it in the normal way that you used earlier. Before starting the PC, ensure that all the screws are tightened, and there’s no cable wire around you.

You need to follow the above mentioned steps so that your query will resolve on how to remove thermal paste.

Conclusion!

The steps mentioned above will help you how to remove thermal paste on the CPU. You need to follow these steps in a centralized manner so that no step will be skipped. When you remove the CPU thermal paste, you will see that your processor heat efficiency optimizes, and your system executes a powerful performance.

FAQs:

Nail polish removers include harsh chemicals that will not be best for your computer’s internal components. So, it is advisable not to use nail polish remover.

Because of the water contents, it is not recommended to use hand sanitizer to remove the thermal paste. If you use it mistakenly, then it may damage your components.

No, the thermal paste on a PC processor doesn’t last forever. You have to change it after one year when you experience system performance issues.

Yes, keep your thermal paste away from the heat, as the thermal paste is not good for heat and moisture. If your CPU’s thermal paste is exposed to heat and humidity, then it can degrade the thermal paste quality. As a result, your thermal paste is near to the damage.

Related News

LEAVE A REPLY

Please enter your comment!
Please enter your name here